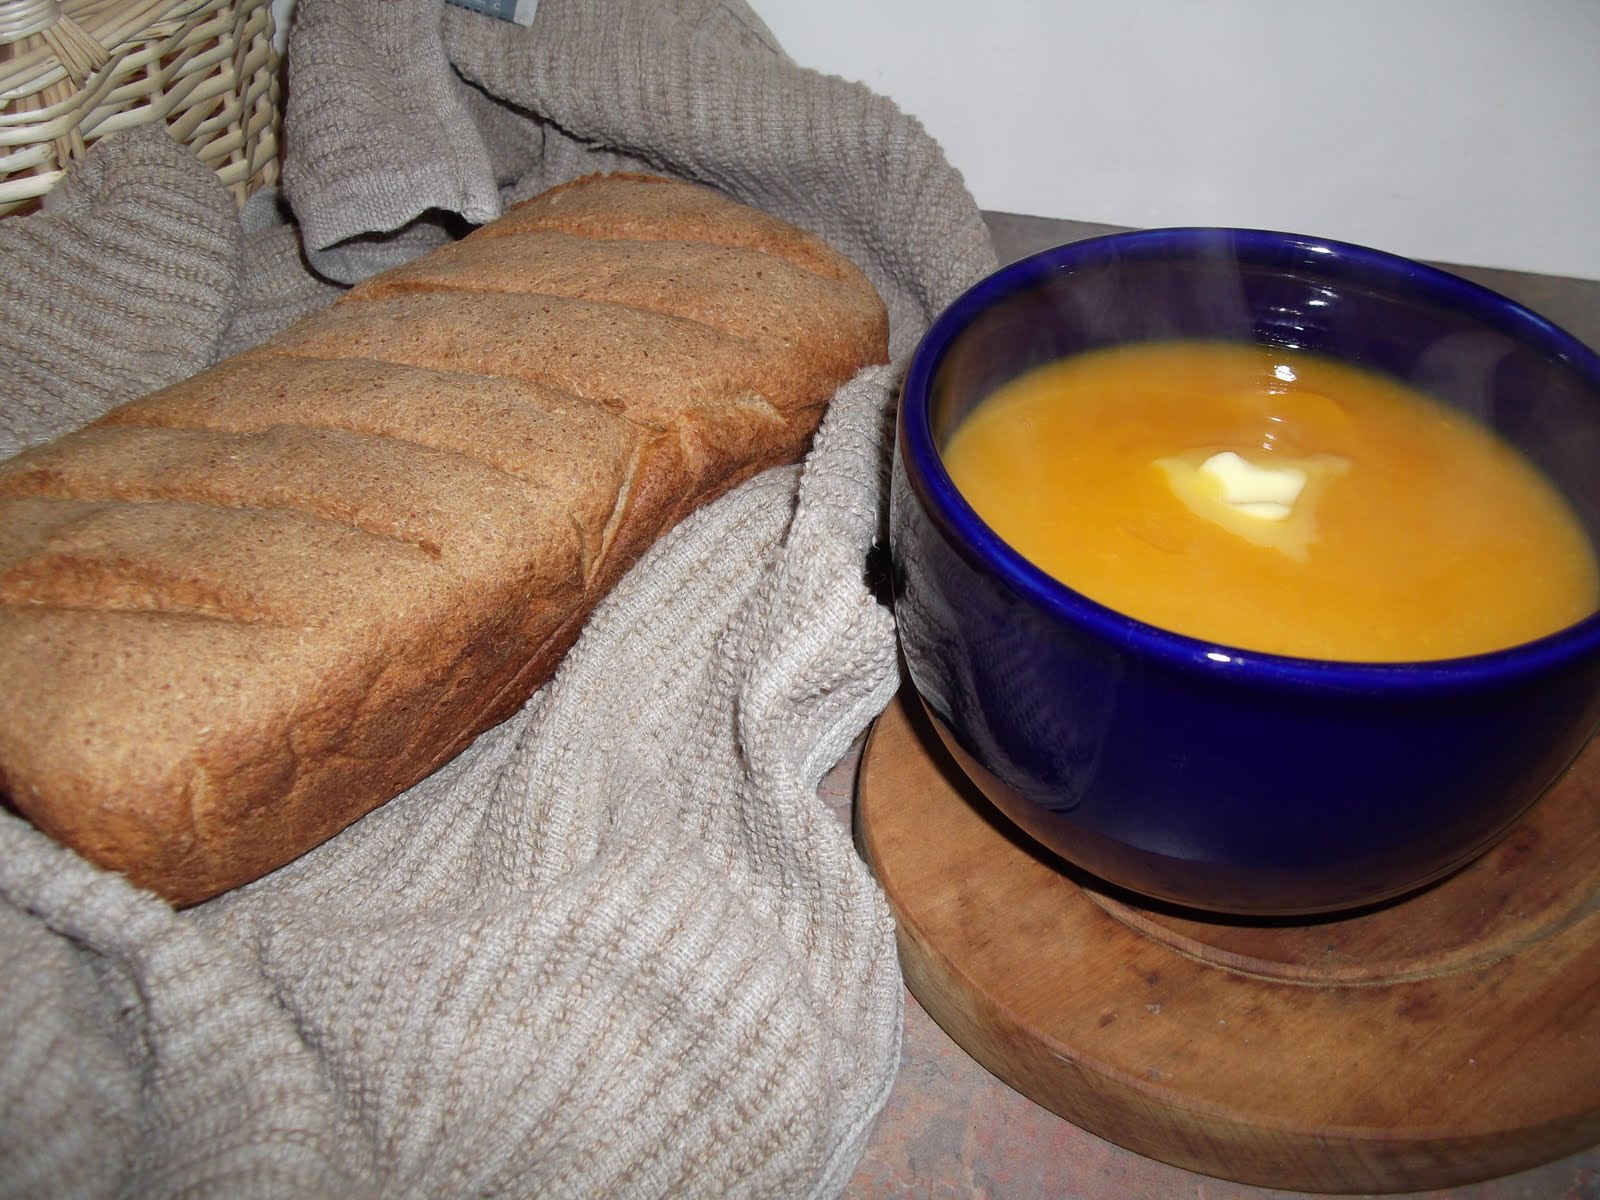
Nothing beats it in winter! Not to mention it also happens to be cheap as dirt - the only way it can ever possibly be referred to dirt by the way - and simple make.
The only down side is this soup lacks a bit on the protein side, so perhaps it's not the best thing to live off of in the winter. However, Pumpkin does happen to be a fantastic sources of Vitamin A, with an average of 245% (or 12230 IU in other words) of your daily needs met with just 1 cup of mashed pumpkin - and we all love the benefits of vitamin A, such as being able to maintain healthy eyesight.
Now although the soup is quick and easy, and can be prepared and cooked within about an hour... the bread cannot. And that is why I recommend you start this labour of love in the morning.
Making bread should not be about how quickly you can do it. This is a sure way to fail. Making home-made bread should be looked at as a process... A process that you leave and come back to... a lot.
But don't fear, your day of hard work will be well rewarded as there is nothing in the whole entire world that I prefer the taste to, than home-made bread, fresh out of the oven, with about half a cup of butter smothered all over it. The day you make home-made bread is not a day you should be thinking about silly things like calories, weight, scales or that pair of jeans in the back of your closet.
So how do we make this marvel of man kind? Lets start with the bread, it is of course what you'll be making first!
The recipe is for Wholemeal bread and it is from the Edmonds cookbook, however I just used Spelt flour instead of the wholemeal/wheat flour since that's what I got from Huckleberry Farms. You could undoubtedly just use wholemeal flour if you don't like the taste of Spelt flour. Spelt flour has a nutty taste and is quite different to wheat flour, but it has the added benefit of containing more protein that wheat flour, with about 4g of protein more per cup. It also contains less calories, which means you can add more butter onto your slice of warm steaming bread at the end!
Spelt Bread Recipe
1 cup warm water
3/4 cup warm milk
1/4 cup honey
1 tablespoon yeast
6 cups Spelt flour
1 1/2 tsp salt
50g butter
(I halved this recipe and made 1 loaf, this recipe is for 2 loaves)
Although there are a few more ingredients than the usual bread I'm used to making, it was still pretty easy.
Warm the milk, water and honey (I recommend putting them into a microwave proof jug and microwaving them for a minute) together until lukewarm. Pop in your yeast and wait around 10 minutes or until it froths up.
I've heard a baker say that the liquids don't need to be warm ,it just makes it faster... but I've never tried doing it with cold fluids. But I guess just keep in mind that if your liquid is a bit colder, it might take longer for the yeast to "prove".
Right, so you have your yeast ready!
Now sift the flour into a second bowl and mix in the salt and 50g butter with your fingers. Crumble it all together until it resembles breadcrumbs, then add the yeast mixture.
Knead with your hands into a rough ball and then tip out onto a floured surface.
If it's a bit sticky, just keep kneading flour into it until it turns smooth and doesn't stick to your fingers.
Kneading and leaving the bread to prove are the most important things when it comes to making bread.
Make sure you keep on kneading the bread until it becomes smooth and elastic. It will become quite dense and heavy, but that's okay. After it has risen it will be lighter again.
At this point you're supposed to brush it with oil to stop it from drying out, but I don't have any NZ olive oil yet so I just melted a teaspoon of butter in my hands and massaged it over the bread.
Now, I let it sit on the bench and left it for a couple of hours, the most easy part of making bread. I did a bit of cleaning and then went out to my Body Balance class (yoga/tai chi/pilates/hippy-stretches), came home and it had grown quite well. You want it to at least double in size. Once it has doubled in size (the time it takes will depend on how warm your house is, so put it somewhere warm. People suggest hot water cupboards, mine however is stuffed full of blankets!) , take it out of the bowl and knead again. Probably for a minimum of 10 minutes. Get into the zone and get a rythym going with your hands and listen to some music, it helps. Look out your kitchen window, what can you see? A bird? A veggie patch? Your neighbours? What are they doing?
 |
| (Leaving the bread to rise in a loaf tin.) |
Right after about 10-15 minutes have passed, try to stop spying on your neighbours and pop the bread into a bread loaf tin.
Alternatively you could just form it into a ball and pop it on a baking tray. I hate bread not coming out of loaf tins so I was a tad naughty and lined it with baking paper. I know, not very eco friendly. Baking paper is my best friend, just can't stand to part with it yet.
Now you get to mimic that "30 seconds spray and walk away" guy and leave the bread again. Only you better make it a couple hours, not just 30 seconds. Once the bread has risen to the top of the loaf tin (I settled for 1/2 an inch below it), pop it in the oven for 40 minutes at 200c and sit back and enjoy the smells waft through your home!
After 40 minutes, give it a tap and if it sounds hollow, take it out. Lift it out of the loaf tin and wrap the loaf with a tea towel. My tip would be to then pop it into a plastic bag as it helps keep in the steam which in turn helps kept the crust a bit softer. The tea towel will keep it from going soggy however.

Pumpkin Soup
Pumpkin soup was never just pumpkin in my house hold. I mentioned my disgust when my sister made pumpkin soup without potato and carrots and she thought I was mental. My mother then admitted she only put those extra vegetables in to bulk it up. But that will always be the way that I like to have it!
The measurements don't need to be precise, it's more of a matter of how you like it and how much of what you have in the cupboard.
1/2 crown pumpkin
4 medium onions
2 carrots
1 large potato or 2 medium potatoes
1 tsp salt
Peal and chop all the vegetables then chuck them into a pot and pour in just enough water to cover the vegetables.
Pop in the salt and cover with a lid and boil for an hour or so.
When all the veggies are well cooked, chuck into a blender or puree with a stick blender (Ahh, stick blender, where would I be without thee?). Because there may be too much fluid, it's a good idea to strain off about half the liquid in the pot before you start to puree it, then add it back in as you need it to get the thickness you desire!
And there you have it... Definitely not difficult. Definitely not expensive and all with NZ Grown produce found right in your supermarket!
Mmm, now fill up that bowl or soup cup, smother that hot bread with all the butter you can dream of and sit back and enjoy!
God knows you deserve it after all that hard work!
No comments:
Post a Comment